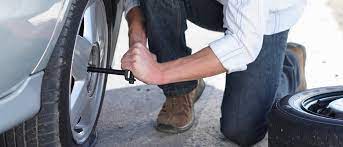
How To Repair A Flat Tyre

How To Repair A Flat Tyre
While many people drive for decades without ever encountering a flat tyre, it’s always worth knowing what to do in case of an emergency,
so you can get back on the road as quickly as possible.
According to a recent Which? survey, more than half of new cars come with a repair kit, rather than a spare. With this in mind,
we’ll be breaking down exactly how to identify and mend a punctured tyre in this step by step guide,
so if you’ve no spare tyre, it’s no problem.
How to Identify a Flat Tyre
Depending on the severity of the puncture, you might not always immediately notice a flat tyre. However,
there are a few telltale signs which could signal it’s time to come safely to a stop, and take a look at your wheels.
It becomes very difficult to steer
Your wheel bumps as it turns, causing vibrations
You can hear the tyre making a repetitive “thwump”
If you do notice any of these symptoms, pull over as soon as it’s safe. Driving with a flat tyre compromises your control of the vehicle,
and can also cause further (more expensive) damage to your wheel.
How To Use Your Repair Kit
In most cars, you can find your repair kit under the flooring of the boot, or tucked away in one of the side panels.
It’s worth checking where yours is kept, in case you ever need to find it in a hurry. Here’s how to use your repair kit:
1) Firstly, make sure you’re parked somewhere safe, and away from the flow of traffic. If you’re on the motorway,
and can’t make it to the services, it’ll have to be the hard shoulder or a lay-by.
2) Make sure your handbrake is fully engaged and turn your engine off,
then put your hazard lights on to let people know you won’t be there for long.
3) Now you can get out and have a look at the tyre in question.
If it’s a small hole or a nail embedded in the tyre, you should be able to carry out a quick fix using your repair kit.
However, if the alloy wheel itself is damaged, or the tyre is badly torn, you’ll need to contact breakdown services.
TOP TIP: If there’s an object like a nail or a piece of glass causing the puncture – don’t remove it –
this could make the hole bigger. Next, open your repair kit. Most of them consist of two parts –
a compressor and a bottle of tyre sealant.
Unscrew the valve cap on the puncture tyre and attach the nozzle of the sealant bottle;
once it’s attached, the pressurized sealant should spread evenly inside the tyre, plugging up any holes.
4) Now it’s time to reinflate your tyre. Detach the bottle of sealant from the valve,
and attach the compressor in your repair kit. Take the other end of the compressor,
and plug it into the 12v socket (or cigarette lighter) in your car.
5) Check your car’s handbook to find out the recommended pressure for the tyre in question.
Usually this varies slightly between the front and back tyres.
6) Start the engine, and turn the compressor on to begin inflating your tyre. You need to inflate your tyre until it reaches the figure recommended.
7) Tyre failing to inflate? The sealant might not be evenly distributed. You can sometimes fix this problem by rolling your car a few metres forward or backwards, to spread the sealant around inside the tyre.
8) Once it’s up to the right pressure, you can unplug the compressor, detach it from your tyre and screw the valve cap back on tightly.
This method is generally very effective for small to medium-sized punctures, but it’s important to remember that this is still only a temporary fix. To prevent the puncture from recurring, and ensure your car is properly roadworthy, you’ll need to take it into the garage so they can replace or permanently mend your tyre, as soon as possible.
If you try this process, and you still can’t get your tyre to inflate, you’ll need to call your breakdown service for help.

.png)
.png)
.png)
.png)


