.png)
.png)
.png)
.png)
HOW TO TOUCH UP CAR PAINT
HOW TO TOUCH UP CAR PAINT
No matter how careful you are as a driver, you will always end up with a few paintwork scratches and scuffs on your car. Whether you accidentally hit a hidden bollard or a careless driver damages your car in a car park, there are times you will find damage that needs repairing.
If you have a paintwork scratch, scuff or scrape, the best thing to do is to contact ChipsAway for car paint repair. We can repair the damage and leave you wondering where the damage was in the first place! Plus all our work comes with a lifetime guarantee that you’ll be happy with it.
However, if you are tempted to repair any small paintwork chips yourself, this is the process to follow when it comes to how to touch up car paint, along with some comparisons to the full ChipsAway repair process.
Car Paint Touch Up: What you will need
You may already have some of these supplies at home, but in order to complete a car paint touch up, you will need the following:
Gloves
Clean microfibre cloth
Fine sandpaper
Cloth for cleaning
Car cleaning solution
Colour matched touch up paint
Applicator brush
Primer
Polish solution
Instructions to Touch Up Car Paint
1. Is the damage suitable for a touch-up?
We don’t recommend attempting to repair any large scratches yourself; touch-ups are best kept to small areas, to reduce the chance of making the damage worse. If you just have a tiny blemish to repair, the next step is to:
2. Find and order car paint
There’s more information on finding the right colour in our blog here. You can then order a small car paint touch-up bottle, which should come with an applicator brush. You will also need some primer, to help the paint adhere to the metal.
It’s worth bearing in mind that you may not be able to get a direct match for your car just from buying generic paint, especially with older models. The new paint may be noticeable compared to the old paint, just because of the way that colour ages. At ChipsAway, we are able to precisely mix the paint required, to ensure a perfect match.
3. Wash the area thoroughly
Use detergent or specialist cleaning solution which will remove any layers of wax or polish.
4. Sand and prime
Use fine sandpaper to prepare the area for painting – paint will adhere more readily to a rougher surface. Be careful not to remove too many layers. If there is any bare metal showing, ensure that a tiny amount of primer is used to cover this, making sure to keep it away from the paint itself. Primer will also stop any rust from forming under the new paint.
During this stage in a ChipsAway repair, we will have masked off all the surrounding areas and will carefully remove the paint altogether, to prime and repaint, giving a professional finish that blends in with the original paintwork.
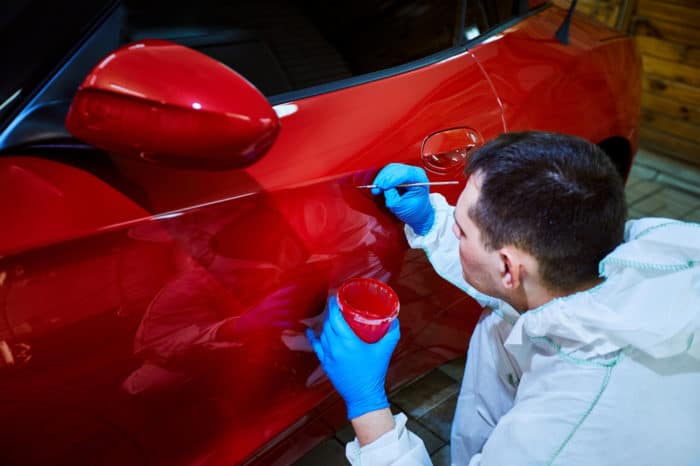
5. Apply the paint
Use the applicator to gently apply a small amount of paint in regular brushstrokes, only to the affected area. This is the element of the job which can become a labour of love, as it requires patient attention to detail.
It takes several days for paint to be fully dry, so be aware of this. With a ChipsAway repair, we use special, infra-red lamps and apply the paint in thin layers, drying each layer thoroughly, so the repair will be much more complete than if done as a DIY touch-in.
6. Once dry, finish with products
You can then apply polish to the paintwork to protect it and choose a suitable wax product to keep it looking good after this.
The repair job at ChipsAway is finished with a professional polish using a machine, to really get the paint glowing!
We hope this gives you some helpful pointers if you are considering touching up your car’s paint, as well as some advice as to when it’s best to have professional work done. If you’d like someone from ChipsAway to assess the damage on your car for scratch or dent removal and provide a free, no-obligation quote, please complete our online form.